Efficient labelling thanks to attribute assignment in dispos
In LEADING Media, we offer a powerful additional function for efficient media planning: attribute assignment for positions and selection for printouts, statistics and invoices based on this. This function enables users to assign different attributes to positions and to select and filter positions based on these attributes.

What can I use attributes for?
Imagine you have a large number of advertisements to manage. You can use attribute assignment to give these ads individual characteristics. Here are some examples of the practical use of attributes:
- Distinguishing various special advertising formats for TV adverts
- Allocation of agency-internal products
- Differentiation between various free spots (on top, barter transaction, according to contract, equalisation placements, ...)
- More precise labelling of placements (TV commercials, print (pages, sections), ...)
- Assignment of customer-specific features
You can assign as many attributes to a position as you need. You can then easily select and filter these positions based on these attributes on your printouts, statistics and invoice drafts.

The attributes are clearly displayed as separate columns in the position overview and the checking list listbox, which makes navigation and identification easier.
How do I create an attribute?
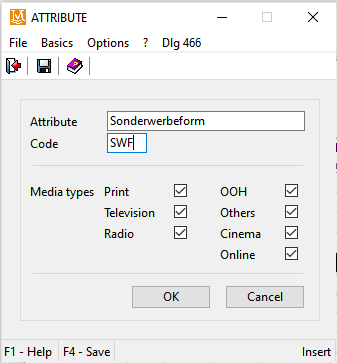
In the basic data, click on "System basic data", then on "Attributes positions". Click on the "Create" icon. Enter a name for the attribute and an abbreviation for it and click on "OK".

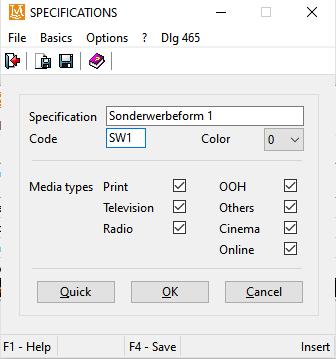
To create the different specifications of the attribute, click on the "Specs" button. You can now assign a name and a code abbreviation here. For a better overview, you can define a different colour for each specification here.

How do I use attributes in the position overview?
In the position overview, select the positions to which you want to assign attributes and then click on the "Attributes" icon in the menu bar or on the "Attributes" button.

You will now see the available attributes. For the attribute you want to assign, click on the downward-pointing arrow on the right-hand side of the field and select the appropriate specification by double-clicking or pressing Enter. Click on "Ok".

To display the attributes in the position overview, add the corresponding columns using the "Manage columns" option.
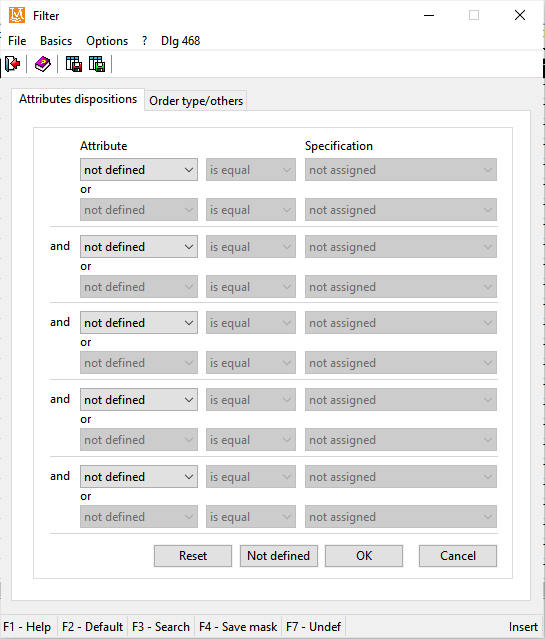
You can now filter for this attribute in all desired printouts, such as in the media and cost schedule, etc., as well as in various analyses and statistics - including the checking list, of course - and when creating invoice drafts.

We have summarised how to manage columns effectively, exploit the full potential of the filter function and even more practical functions for you in the blog article "Five professional tips on how to use LEADING Media even more productively".
How can I activate the attribute function?
Most of our LEADING Media clients have already activated this feature. If you do not see this option in your dashboard, please contact our support team.
Activate the attribute assignment function and benefit from:
- More flexibility
- Increased efficiency
- Improved analysis options
Related topics:
Five Useful Tips to Increase Your Performance With LEADING Media


